
How to Repair Bare Patches in a Lawn
Before anything else: find out why the patch is bare. Reseeding a patch whose cause is still there — deep shade, a worn path, water sitting after rain — buys you a few weeks of green and then the same bare patch. The sowing is the easy part; the diagnosis is what makes it stick. When you are ready to sow, work out the seed first — measure the patches, not the lawn.
Affiliate links: As an Amazon Associate I earn from qualifying purchases. It costs you nothing extra.
What you need to fix bare patches
Prefer it delivered? Your local garden centre is the best place to compare bags in person — or order these online:
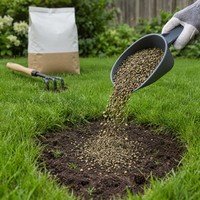
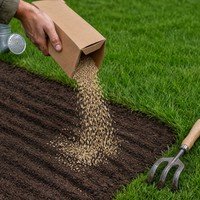 Miracle-Gro EverGreen Fast Grass Seed, 480 gQuick-germinating seed for new lawns and gapsView on Amazon →
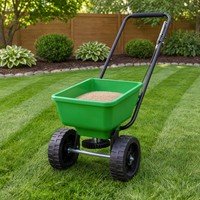
Images are AI-generated illustrations, not photos of the exact product. Check the product, price and availability on Amazon.
1. Work out why the grass went
Walk the patch and ask what is different about that spot. Most bare patches in British lawns come down to a handful of ordinary causes, and each one needs a different answer:
- Shade. Under a tree, beside a fence or north of the house, ordinary lawn mixes struggle. The RHS has specific advice for lawns in shade; a shade-tolerant mixture will do better than the same mix that already failed.
- Wear. The desire line from the back door to the shed, the spot where the goal always was, the corner the bins go. Grass loses to repeated footfall. Reseed if you like, but consider whether that route wants a path or a stepping stone instead.
- Water sitting after rain. If the patch is soggy days after everyone else has dried out, you have a drainage or compaction problem rather than a grass problem. The RHS covers waterlogged lawns separately, and that is the job to do first.
- Drought and heat. Thin, straw-coloured patches on a sunny bank in August are usually a water story, not a seed one. Established lawns often recover on their own once the rain returns.
- Something underneath. Buried rubble, a dried-out hollow, old hardcore from a shed base. Dig an inch down before you plan a repair — it takes a minute and it occasionally explains everything.
One thing this guide does not do. If the damage looks like a pest or a disease — patches that spread, distinct shapes or colours, turf that lifts away from the roots — stop here. That needs a proper identification, which is a different job from a repair, and we do not offer pest or disease treatment advice. Take photographs and get it identified before you treat anything.
2. The question to answer honestly
Will the cause still be there next spring? If yes, reseeding is not a repair, it is a postponement. Fix the shade, reroute the path, improve the drainage, or accept that the spot is not going to be lawn and do something else with it. If the cause has genuinely gone — the paddling pool has been put away, the building work is finished, the branch has come down — then reseed, and it will hold.
3. When to do it
The RHS says lawn repairs are best made in spring or autumn. The reasoning is the same as for sowing a new lawn: warm soil, reliable moisture, and weather that is neither baking nor freezing. As with sowing, read that as a description of conditions rather than a date — a waterlogged autumn or a cold late spring will beat the calendar.
4. Prepare the patch properly
This is where most repairs are won or lost. The RHS method, which is worth following as written:
- Cut out the damaged area in a square, about 5 cm deep, using a half-moon edging iron or a flat-bladed spade. A square is easier to work to than a ragged outline, and cutting deep enough gets you below compacted surface.
- Lightly fork the soil underneath, so roots have somewhere to go.
- Work in topsoil or compost to bring the level back up.
- Firm it level with your feet. Level matters: a hollow collects water, a hump gets scalped by the mower.
5. Measure and work out the seed
The RHS gives roughly 15–25 g per square metre for bare patches — and says to sow at the rate advised on the packet, which takes precedence over any general figure.
Measure the patches, not the lawn. Three patches of half a square metre each need seed for 1.5 m², not for the 80 m² they sit in. The grass seed calculator will add up as many separate patches as you give it and turn them into grams, kilograms and whole packs — use its overseeding and patching mode.
6. Sow, then cover it
Scatter the seed evenly over the prepared soil at the packet’s rate. Then cover the seed with a light layer of topsoil or compost. You can also cover the patch with fleece, pinned down at the edges.
That covering is not optional decoration — it is what stops the birds eating a meaningful share of what you just measured out so carefully.
7. Water, and be patient
Water gently, with a fine rose, so you do not wash the seed out of position. The RHS is direct about the follow-up: new grass dries out easily, so water regularly if there is not enough rain over the following months.
And set your expectations before you start. Seed is the cheaper option, but the RHS notes it takes several months to establish. If you need the patch usable sooner and you have spare turf to lift from a hidden corner of the lawn, turfing gives an instant fix at the cost of the donor area.
8. When to stop repairing and think again
If you have reseeded the same patch twice and it has failed twice, the patch is telling you something. Repeating the treatment a third time is not a plan. Go back to step one: what is different about that spot, and has anything actually changed? A shaded, compacted, walked-over corner may need a shade mixture, aeration and a stepping stone rather than another bag of seed — or it may need to stop being lawn.
Sources used on this page
- RHS — Repairing lawns: reseeding and returfing (timing; cutting out a 5 cm square; forking and working in topsoil; firming; 15–25 g/m² at the packet rate; covering seed against birds; watering with a fine rose; several months to establish; turf as the instant alternative)
- RHS — Lawns in shade
- RHS — Lawn care for drought conditions
- RHS — Waterlogged lawns
How this guide was checked
The method, depths, rates and timings above were taken from the RHS pages linked, read in October 2026, and are quoted rather than re-worded into something firmer. Where the RHS gives a range — 15–25 g/m² — the range is reproduced, together with its own instruction that the packet rate takes precedence.
The diagram is our own, drawn to the method described here, and is not to scale. There are no photographs on this page yet; when there are, any that were generated rather than taken will say so.
We are not horticulturists and do not claim to be. This guide deliberately stops short of pest and disease diagnosis or any treatment advice, because that needs expertise we do not have. If something here is wrong, tell us and we will correct it and say that we did.