
How to Mulch an Existing Border
The short version: weed the bed, wait for soil that is moist but neither frozen nor squelchy, then spread 50–75 mm of organic matter over the surface — keeping a 10 cm gap around woody stems and staying off the crowns of perennials. Late winter to early spring is the usual window. Work the quantity out before you buy, because almost everyone underestimates it: our mulch calculator does that part.
Affiliate links: As an Amazon Associate I earn from qualifying purchases. It costs you nothing extra.
What you need for this job
Prefer it delivered? Your local garden centre is the best place to compare bags in person — or order these online:
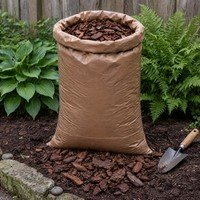
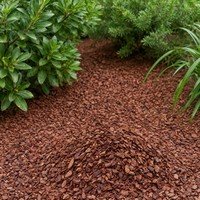
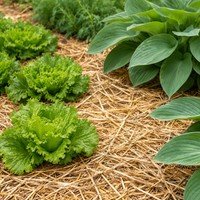
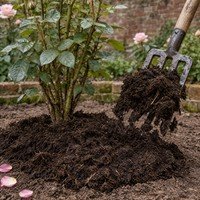
Images are AI-generated illustrations, not photos of the exact product. Check the product, price and availability on Amazon.
1. Decide whether today is the right day
This is the step people skip, and it is the one that decides whether the job does any good at all. A mulch holds in the moisture that is already under it. It does not add any. Spread it over dry soil and you have sealed dry soil in.
The RHS points at late winter or early spring, when the soil is damp from winter rain, and says to delay if the soil is very wet (squelchy) or frozen. A second RHS page gives a wider window of mid to late spring and autumn, and adds the useful detail that mid to late spring catches the moment when annual weeds have not yet germinated and herbaceous plants are still dormant.
So the practical test is not the date. Push a finger into the soil. Damp and crumbly, go ahead. Dusty, water the bed thoroughly first and mulch the next day. Waterlogged or frozen solid, wait.
2. Weed it — but not all of it
Dig out perennial weeds before you mulch. Bindweed, couch grass, dandelion, ground elder: a layer of mulch will not beat them and you will be picking them out of it all summer.
Low-growing annual weeds are a different matter. The RHS says it is not essential to remove them, because a covering of mulch will smother them. That is a genuine time saving on a big border — concentrate on the perennials and the deep roots.
3. Work out the quantity before you go shopping
Measure the bed, pick your depth, and get a figure in litres or cubic metres before you buy anything. A border that looks like “a couple of bags” is usually ten or more.
The mulch and compost calculator handles the measuring and the maths, including odd shapes, bag counts and the bulk-bag problem. We have kept the detail there rather than repeating it here.
4. Choose what to spread
The RHS is relaxed about this: you can use a whole range of organic matter, but home-made compost or leafmould are usually the best options. Bark and composted woodchip are the common bought alternatives, and well-rotted manure suits a hungry vegetable or rose bed.
One thing worth checking before you buy a trailer-load: whether the material is composted. Fresh woodchip spread thickly over a planted border is a different product from a composted bark mulch, and behaves differently.
5. Spread it to a real depth
For composted organic matter, the RHS gives at least 5 cm (2 in), ideally 7.5 cm (3 in). Chipped or shredded wood is the exception and can go deeper, roughly 8–12 cm (3–5 in).
Thin mulch is wasted mulch. A 20 mm scatter looks tidy for a fortnight and does almost nothing for moisture or weeds. If you have not got enough material to do the whole border properly, do part of it properly instead. The RHS makes the same point from the other direction: its own suggestion is to mulch about a quarter of your beds and borders each spring rather than everything every year.
6. Keep it off the stems and crowns
Leave a 10 cm (4 in) mulch-free circle around any woody stem. The reason is specific: mulch piled against the base of a shrub or tree stays damp and can cause rotting. The same applies to the crowns of herbaceous perennials — bury the crown and you may lose the plant.
Take care, too, not to smother low-growing plants. A 75 mm layer is deeper than a lot of alpines and ground cover are tall.
7. Afterwards
Organic mulch is meant to disappear — that is the point of it, and it is why the job repeats. The RHS advice is to top up the layer each spring: pull out by hand any weeds that have come through, then add a fresh layer.
In the first few weeks, check that nothing has been buried by accident, especially after heavy rain moves material about. Around newly planted fruit trees the RHS suggests mulching annually for the first three or four years with bulky organic matter, to conserve moisture and reduce competition from weeds and grass.
Four things that commonly go wrong
- Mulching dry soil. The commonest one, and it makes the problem worse rather than better.
- Piling it against stems. Looks neat, risks rot. Keep the 10 cm circle.
- Spreading it too thin to work. Under 50 mm you are decorating, not mulching.
- Burying small plants and crowns. Walk the bed afterwards and uncover anything that has vanished.
Sources used on this page
- RHS — How to mulch with organic matter (timing, soil condition, weeding, what to use, depth, the 10 cm circle, topping up)
- RHS — Mulches and mulching (application window, crowns of perennials, how much to do in a season)
- RHS — Woody waste: using as mulch (the deeper range for chipped wood)
- RHS — Fruit trees: feeding and mulching (mulching newly planted fruit trees)
How this guide was checked
Every depth, distance and timing figure above was taken from the RHS pages linked, read in October 2026, and quoted rather than rounded or re-worded into something firmer. Where RHS pages give different windows for the same job, we have said so rather than picking one and presenting it as the rule.
The diagram is our own, drawn to the figures quoted here, and is not to scale horizontally. There are no photographs on this page yet; when there are, any that were generated rather than taken will say so.
We are not horticulturists and do not claim to be. This guide summarises published RHS guidance for one common job and tells you what we have not been able to settle. If something here is wrong, tell us and we will correct it and say that we did.